motorhome logo campervanstuff.com

campervanstuff.com

Order online - or call 01759 304561

HOME
About us  

30% off CURRENT STOCK AT OUR UK LOCATION
Search for word in product name or leave blank for all products

SEARCH ALL PRODUCTS for word in product name

Find Product Type :
Choose in list,
wait to see products

Manufacturers:
Choose in list,
wait to see products


SPECIAL OFFERS
- check here for discounts including launch offers on new products

Click the product below or
SHOW ALL current offers


Westfalia Columbus 641e Motorhome 2018 One Owner 14 500 Miles Auto RH Drive
69,990.00


NEW PRODUCTS
- recent additions

Click the product below or
SHOW ALL RECENT PRODUCTS


visa logo
PayPal campervanstuff
  AMEX logo  

Secure Payments
system


OOPS! - JavaScript is not enabled in your browser -

Why you should please turn it on and put us back onto our wheels.

SF600 Digital Satellite Finder LCD Confirms Dish Aim Quick Easy Built in Battery

Zoom
Click image to enlarge

Category: TV and satellite TV
Product is in these Types: Satellite Finder
Satellite meters
Manufacturer: Gecen
Price:  £107.22
SKU: SAT FIND SF600
Quantity:

Stock (or expected despatch time):

Not available - ask


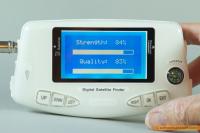
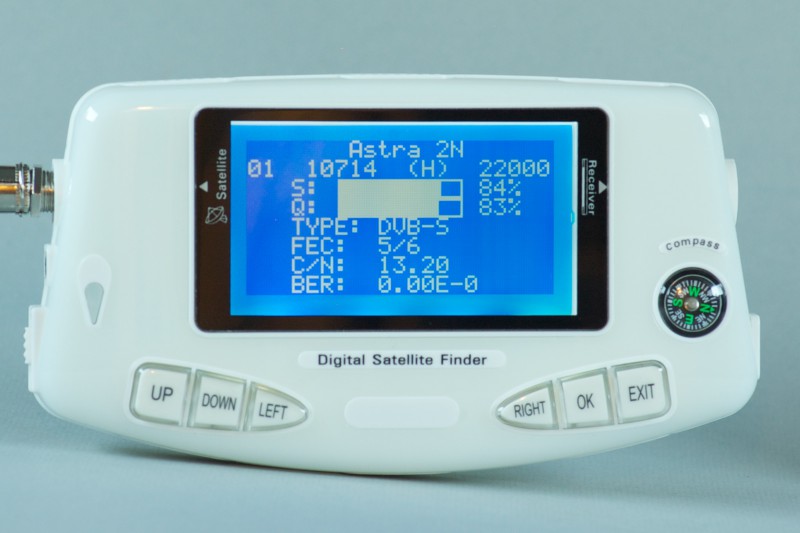
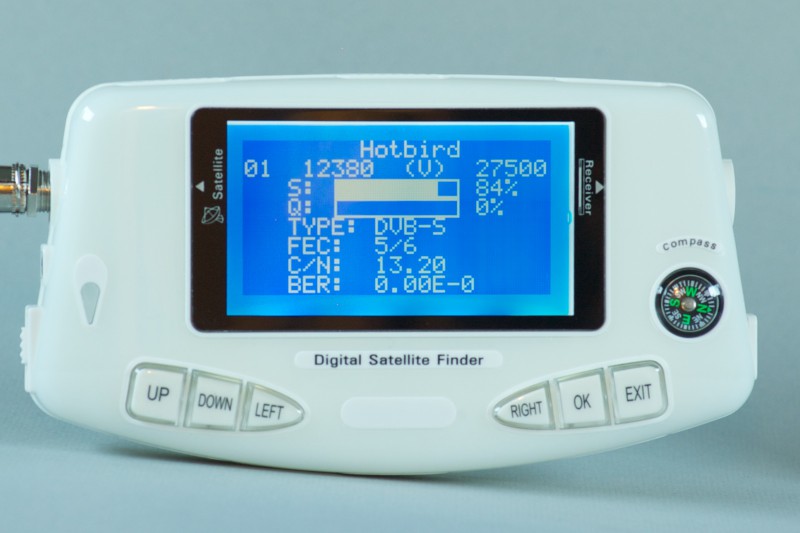
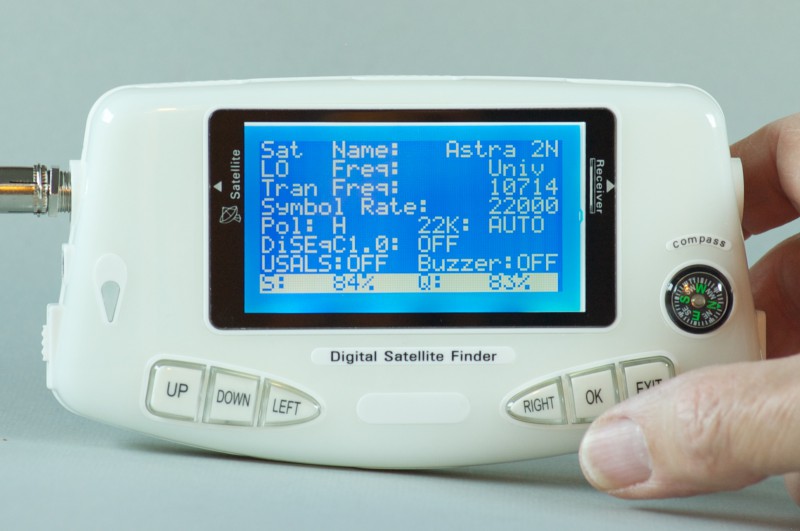
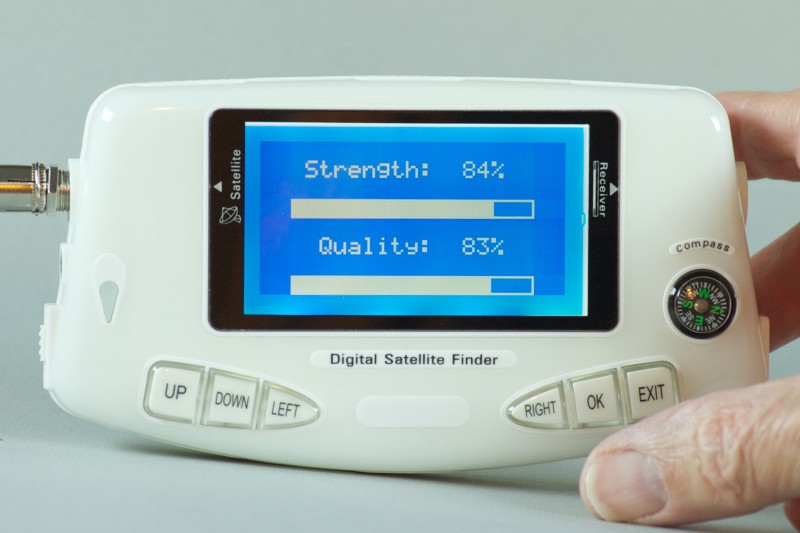
The SF-600 is a portable rechargeable digital satellite finder with an LCD screen which displays graphical bars showing both signal strength and quality, allowing quick, reliable and easy set up of portable satellite dishes. The quality bar confirms that you are locked on to the satellite which you have selected. Set up your dish and tripod on the spot, without needing a connection back to the receiver in your motorhome or caravan. Plus - new lower price!

The unit is supplied already configured with a choice list of four satellites, including the Astra 2 satellite which serves up all the UK channels.

Its built-in lithium battery will power the unit and connected satellite dish for up to 4 hours before requiring charging using the provided mains charging adaptor (the finder will also operate directly from the adaptor whist being charged).

This design means that there is no need to connect a satellite receiver when setting up the dish: you need only connect the SF-600 to the dish LNB via standard satellite cable and F connector. Then switch on the unit, select the satellite you want to find and then move the dish to search the right area of sky.

The SF600 satellite meter from www.campervanstuff.com display signal srength and quality strength to confirm that the satellite dish is pointing at the desired satellite.

The finder's signal strength bar will display a reading whenever it encounters a satellite signal but unless there is also a reading in the vital quality bar it is the wrong satellite - the quality bar will only respond to a signal from the satellite which you have chosen. Once identified, you can easily tweak the elevation and rotation of the dish to obtain the best quality.

Location of the correct satellite is also confirmed by the sounding of a signal alert buzzer - this will only operate when the 'quality' bar is showing a reading. The buzzer can be set to on or off by default, in the settings for individual satellites. Regardless of which default is set, the user can toggle the buzzer on or off- whilst in any screen which is displaying the signal bars - simply by pressing the OK key.

Why we rate the SF600 satellite finder meter GREAT STUFF

We tested the SF600 to see what it provides and how easy it is to use. It has many functions that most users might not need but the main point is that it is very easy to use for everyday setting up of a portable dish and will only confirm when you have found the correct satellite - unlike basic finders which respond to signal for any satellite, even if it is the wrong one. What's more the SF600 is priced at a level which now makes easy dish setting up more affordable - especially if you often find it a time-consuming and frustrating chore.

Quick guide to quick satellite finding

- most users might only use the basic finding functions which are easy, quick and positive:

  • Connect the meter to your dish via F-Connector and standard satellite cable (cable is not supplied).
  • Switch on the unit - you don't need to connect anything else, the meter will supply the power for the dish LNB, and no receiver is needed in order to set up the dish.
  • Select either the Find or List menu item (depending on which bar display and amount of information you prefer to see). Select the satellite - or leave it at the default Astra 2N for UK channels. Press the OK button until you see the screen with the signal and quality bars.
  • You can now adjust your dish until you obtain a good result in the quality bar.
  • Secure the dish in position so that it will not move after you switch off and disconnect the meter. The dish can now be connected through to your satellite receiver.

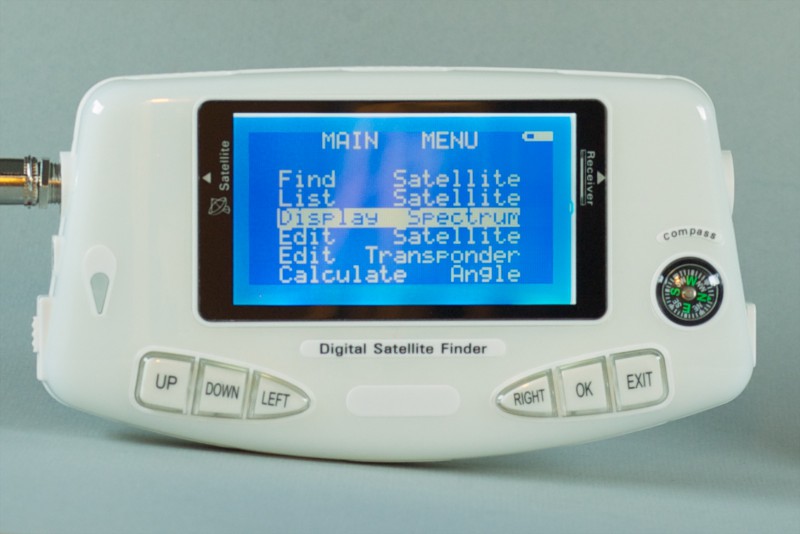
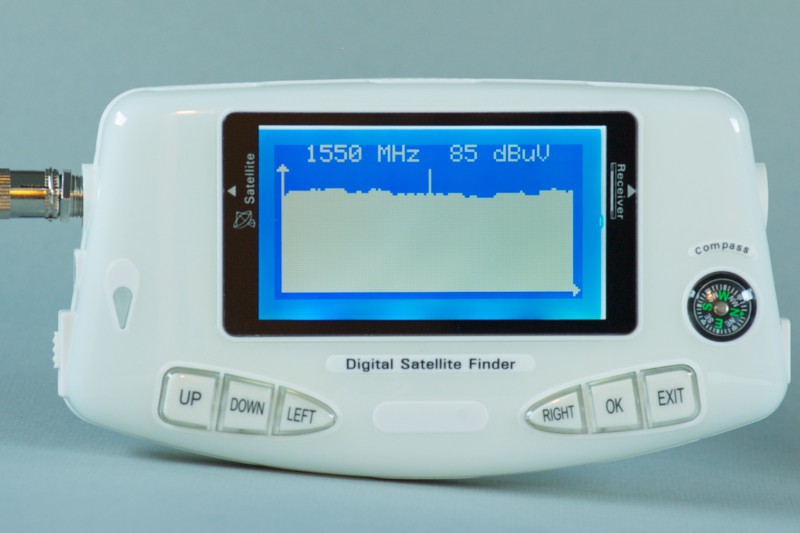
Generally the easiest starting point is to set the elevation of the dish, using the scale which is always provided on the dish structure, so that it is correct for your location. Then rotate the dish slowly from left to right in the direction where the satellite will be located. There are many sources of information about the exact elevation and bearing of each satellite (and also the skew setting for the LNB), from any particular place you might be.

Note that optionally the meter can be connected in-line with the dish and a satellite receiver, although the meter will not be powered by the satellite receiver. After finding is completed, exit the finding screens on the meter to allow the satellite signal to pass through the meter and to your receiver and TV, where you will be able to view the channels.

However the meter must remain switched on and will continue to use its own internal battery power unless you also connect it to its charger / mains adaptor. In most circumstances it's going to be simpler to switch off the meter and put it away - now just couple the satellite receiver directly to the dish coax cable.

Click an image below to view larger photos with captions; you can navigate through the pictures or view as a slideshow.

Switch on the SF600 satellite finder and it will first of all display the main menu. Choose 'List Satellite' and press the OK button to display the choices which have been installed on the device. The SF600 satellite finder is supplied with data preloaded to find four satellites, including Astra 2N which carries the UK television channels. The unit does also have screens where other satellites and transponders can be added or edited manually - but they are not explored in this slide show. Here  Astra 2N has been selected and is highlighted. Press the OK button. This screen shows the transponders which have been set up for the selected satellite (Astra 2N from the previous screen). Press OK again. The screen now shows the details of the satellite and transponder which have been selected - and includes strength and quality bars for the signal that is being received. Most importantly, there will only be a quality reading (in the lower bar) if the satellite dish is aimed correctly and the signal is that of the satellite which you have chosen.  Now you can make small adjustments to the dish elevation angle and rotation until the best quality bar reading is achieved. For comparison, here we have returned to the 'List Satellite' screen and selected the Hotbird satellite. Press OK (twice to skip through the next transponder screen). The detail screen now shows that we are seeking the Hotbird satellite. The top bar shows that there is ample signal strenth being received from the dish; however in this demonstration the dish position has not been altered and still is pointing at Astra 2N. The finder monitors the properties of the signal which it is receiving and matches them against the properties which are expected from the target satellite. The quality of the match is displayed in the lower Quality bar. Because there is no Quality reading in the lower bar we know that we are pointing at the wrong satellite - it is not our search objective, Hotbird. In this photo we have used the Exit button to return to the main menu and this time we will use an alternative way to search for the satellite. We select 'Find Satellite' rather than the 'List Satellite' option which we chose earlier. Press OK. Now the screen shows more technical information about the satellite and transponder. The selected satellite shows at the top, here it is Astra 2N again. The device will remember the last satellite which you used in the screen. On the assumption that mostly you will not be wanting to change this satellite, there is nothing else to be done in this screen (although you might want to set the default for the signal Quality buzzer to on or off). There is already  a summary line at the bottom for signal strength and quality , but if you now press OK again you will see a screen dedicated to displaying just two large signal bars which provide maximum ease and clarity for fine tuning the dish pointing. This screen provides the best clarity when fine tuning the dish pointing. But for practical purposes, many users might find that the smaller bars in the 'List Satellite' route are all that is needed, if they prefer that route. For users who wish to explore in a deeper technical fashion the identication of satellite signals, the unit includes a spectrum analyser. The spectrum analyser screen.


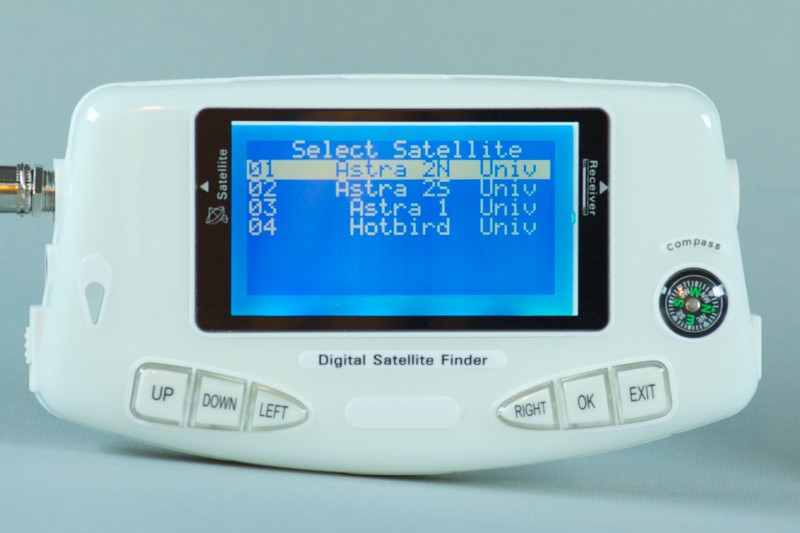
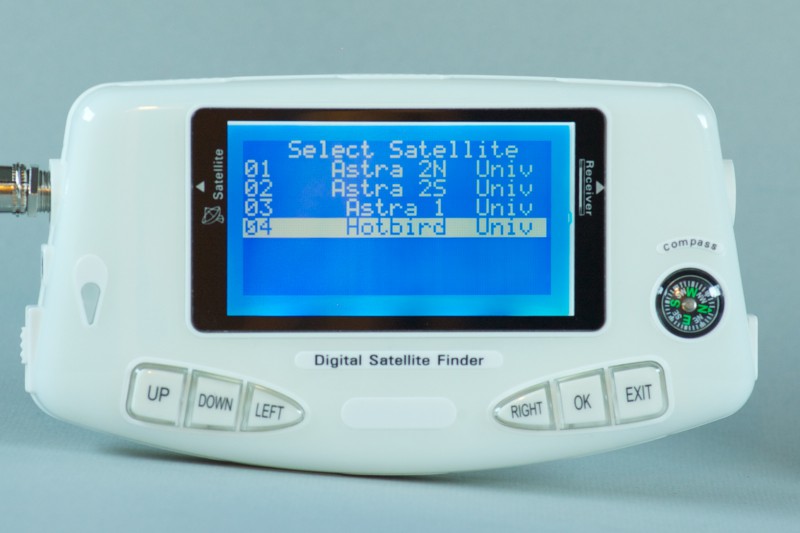
Highlight features

Works out of the box to find the correct satellite for UK TV channels.

Satellites pre-installed (single transponder):
  • Astra 2N
  • Astra 2S
  • Astra 1
  • Hotbird

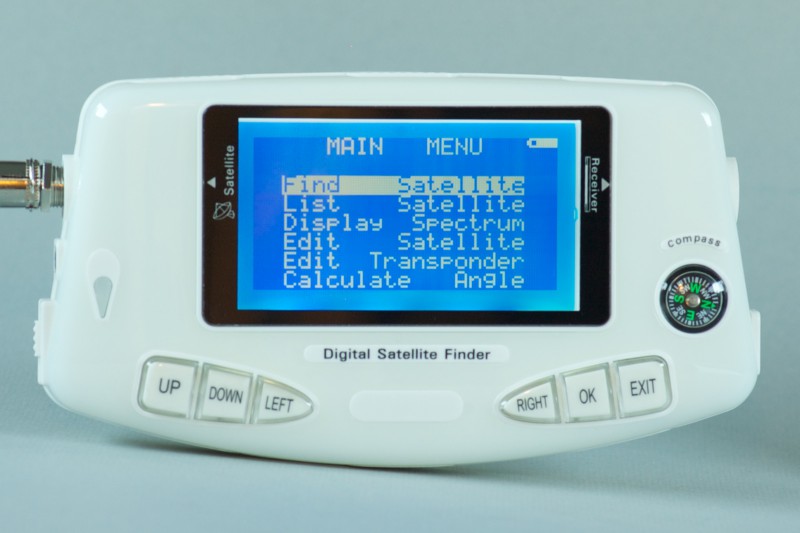
Additional satellites and transponders can be input manually. All data can be edited.

Built-in rechargeable battery or external power supply (mains adaptor/charger supplied)

Can update data through USB port

Supports USALS for motorised dishes

Specifications details

Input Signal

  • Frequency Range:  950-2150MHz
  • Input Level Range:  -65dBm~-25dBm
  • Impedance:  75?

Signal processing

  • Symbol rate:  1 to 45Msps
  • Demodulation:  DVB-S2: QPSK, 8PSK

Others

  • 22KHz control:  Yes
  • DiSEqC 1.0:  Supported
  • USB:  Yes
  • USALS:  Yes
  • Input connector:  F type
  • Operating temperature:  -10deg.C - +50deg.C

Power supply

  • DC power supply:  DC 12 ~20V
  • Adaptor - switching power input:  AC 110 - 240V 50 Hz/60Hz
  • Adaptor - switching power output:  12V DC 1500mA

Accessories included

  • DC power supply (2-pin, requires shaver-type adaptor plug for standard 3-pin socket)
  • USB data link cable
  • Instruction manual (English)
  • 2 x f to f F type connectors


Related products and accessories
Standard Accessories are already included with the main product which you are currently viewing. Click on a product's name to view that product.
Manhattan Nano DSM-4S satellite meter guides dish aim easily, perfect every time £149.45 Alternative Product
ZEHNDER HP480 SATFINDER £27.44 Alternative Product


Shopping Cart
name price #
The Cart is empty

Users Login
 

FORGOT your password - or password REJECTED?

New user? It takes seconds
to REGISTER